How to build a four-shot coverage set for every AI scene so your edit has options
One impressive clip is not a scene. Plan a master, a medium, a close-up and an insert for each beat, and your cuts will finally have somewhere to go.
You generate a shot you love. A woman stands at a kitchen window, rain on the glass, the light is right. You generate another scene, then another, and when you open the edit you have a string of beautiful single clips with nothing to cut between. Every transition is a jump to a new place, so the film plays like a slideshow with motion.
Real crews solve this with coverage: the same moment shot from several sizes so the editor can choose when to move in, when to pull out and when to hide a bad moment. AI filmmakers skip it because each generation costs credits and a single clip feels like the finished product. It is not. A scene needs a small, fixed set of shots, planned before you generate anything.
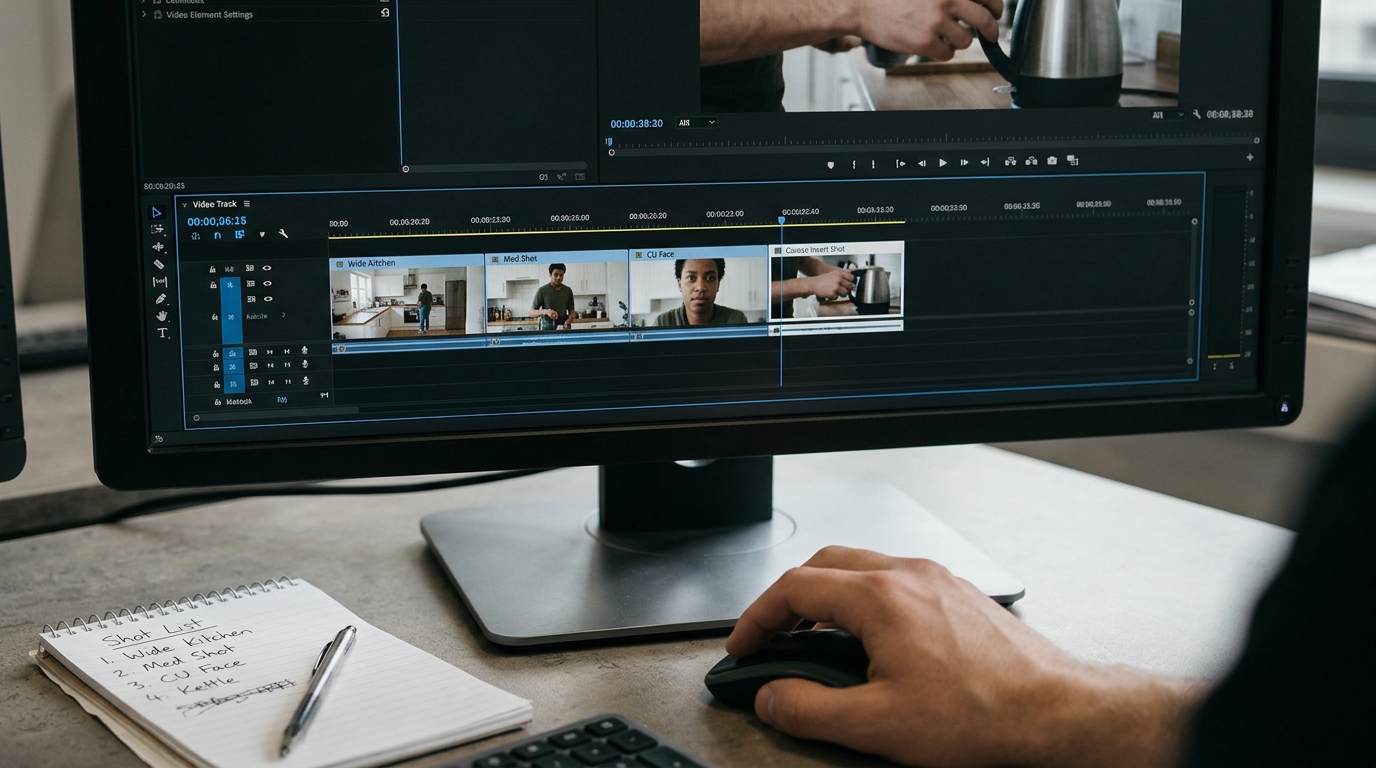
The four-shot set
For every beat in your film, plan four shots and name them in your shot list as A, B, C and D.
- A, master: wide enough to show the whole space and where the character sits in it. This is your geography shot.
- B, medium: waist up, the performance shot. Most of your cutting happens here.
- C, close-up: face or a single hand. This carries emotion and is where you land the end of the beat.
- D, insert: an object the character interacts with, such as a cup, a phone screen, a door handle. This is your escape hatch for covering a flaw.
Four shots per beat is a ceiling for a solo creator, not a target to exceed. A thirty-second scene might be one beat. Four generations, plus retakes, is a manageable budget.
Lock the description, change only the size
The common failure is rewriting the whole prompt for each shot, so the character and room drift. Write one anchor paragraph describing the subject, wardrobe, location and light, and paste it unchanged into all four prompts. Only the framing line changes.
```
ANCHOR: A woman in her fifties, grey wool cardigan, short silver hair, stands in a narrow galley kitchen at a window. Overcast daylight, rain on the glass, pale green tiled wall, steel kettle on the hob.
A (master): Wide shot, full room visible, she stands at the window with her back half turned. Static camera.
B (medium): Medium shot, waist up, she lifts the kettle and pours. Static camera.
C (close-up): Close-up on her face, eyes on the window, a slight exhale. Static camera.
D (insert): Close-up on her hands pouring water from the steel kettle into a white mug. Static camera.
```
Keep the camera static on all four. Movement belongs in a second pass, once you know the scene cuts together.
Generate in this order
1. Generate A first and pick the take you will build the scene around.
2. If your tool accepts an image reference, feed a frame from A into B, C and D so the face and room carry across.
3. Generate D early. Inserts are the cheapest shots to get right, and you will need them.
4. Generate C last, because faces are where you will be most selective about takes.
What you should see
Before, the scene is one clip you have to stretch or abandon. After, you can open on A for two seconds, cut to B as she moves, cut to D when the pour has a glitch in the wide, and finish on C. Cutting between sizes hides small continuity wobbles because the eye resets on each new framing. A flaw in the master no longer forces a regeneration, since you simply leave the master before the flaw arrives.
Your next step is concrete. Pick one scene from your current project, write the anchor paragraph and the four framing lines, and generate only A and D. Cut those two together and see how much more the scene breathes.