How to get real coverage out of a single scene without reshooting everything
Most AI films feel flat because every shot lives at the same distance and the same height. Here is how to plan and prompt genuine coverage, the way a cinematographer would break down a scene before calling action.
There is a problem that shows up in almost every solo AI film and it is invisible until you cut the thing together. Every shot you generated felt fine on its own. The motion was acceptable, the subject was recognisable, the lighting held. But in the edit, something is wrong and you cannot name it. The sequence feels like a slideshow. Your eye has nowhere to go. The film does not breathe.
What you are looking at is a coverage problem. You have a scene but you do not have a breakdown of the scene. Every image was generated at roughly the same focal length, roughly the same height, roughly the same distance from the subject. That uniformity reads as a single flat plane, and no amount of colour grading or sound design will fix it. The solution is not a better model. It is the same discipline a director of photography uses before a single frame is shot: deciding, in advance, what each shot is for.
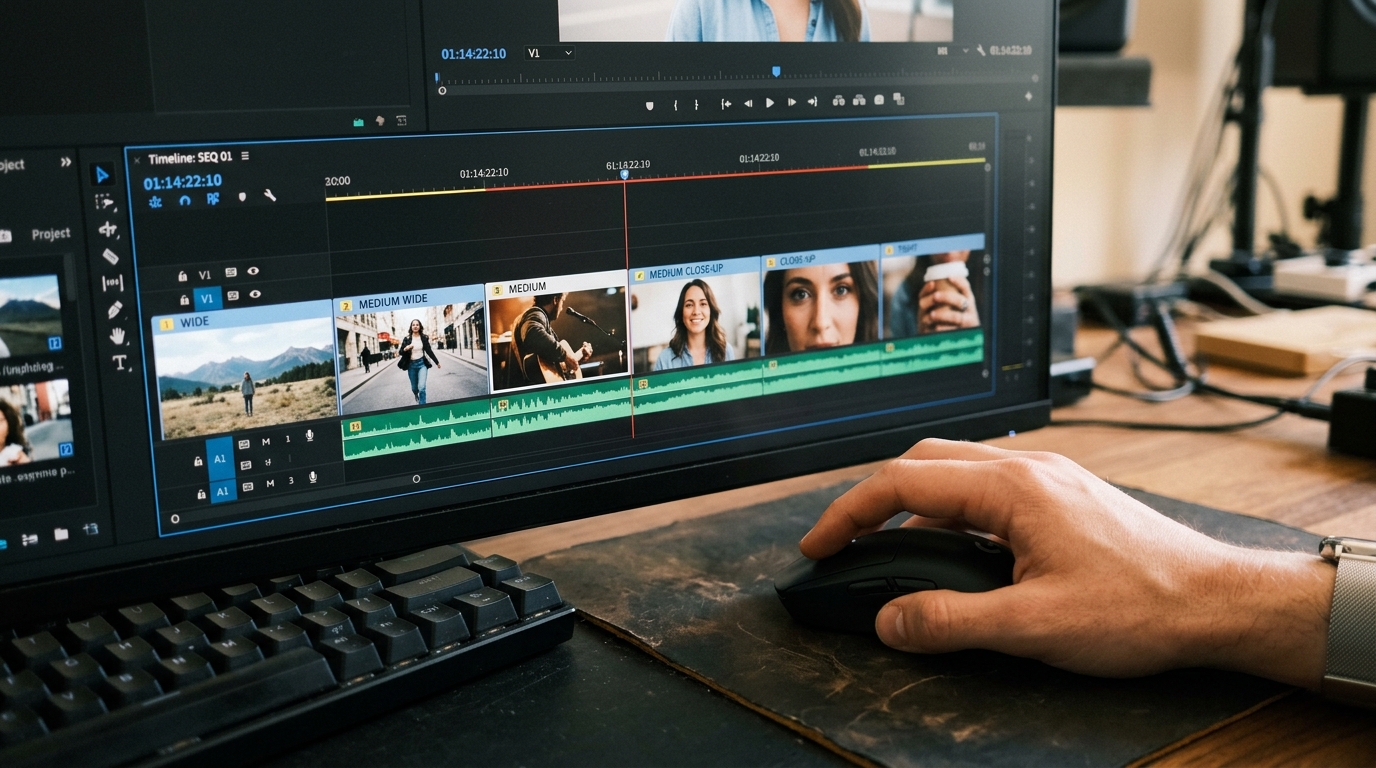
Think in coverage units first, prompts second
Traditional coverage has a grammar. An establishing shot tells the audience where they are. A mid shot carries the scene's action and dialogue. A close-up delivers emotion or detail. A cutaway buys time and provides information. An insert isolates an object. Before you write a single prompt, write these five labels down for your scene and decide which shots serve which function. A two-minute scene can be cut from as few as five or six generations if those generations are actually different from one another in scale and angle.
The mistake most AI filmmakers make is generating variations of the same composition. They change the lighting adjective, or they add a motion word, but the camera position and the focal length stay the same. Variation in subject appearance or motion does not give the editor anything to cut to. Variation in spatial relationship between camera and subject does.
The focal-length anchor method
Real lenses behave in ways that are worth building into your prompt structure as named anchors, because current video models respond to lens language in observable ways. Use these four anchors as the spine of any scene's coverage:
```
[WIDE] Establishing — "wide angle lens, camera far back, full environment visible,
subject small in frame"
[MID] Action carrier — "50mm lens equivalent, waist-up framing, subject centred,
shallow background separation"
[CLOSE] Emotion — "85mm portrait lens, tight on face, eyes in upper third,
background compressed and out of focus"
[INSERT] Detail — "macro lens, extreme close-up of [hands / object / surface],
rack focus from background to subject"
```
Write each anchor as a literal block in your prompt before you describe what is happening in the shot. The focal-length language anchors the spatial relationship. The action language then fills that space. Keeping these two functions separate in your prompt text makes it far easier to swap one without disturbing the other.
Varying height and axis without generating chaos
Camera height is the second axis of real coverage, and it is almost always ignored in AI production. A scene cut entirely from eye-level shots has no power dynamics, no geography, no sense that the camera made a choice. Two quick rules from traditional cinematography that survive direct translation into prompt language:
High angle reduces, low angle empowers. A character shot from above reads as smaller, more vulnerable. Shot from below, they read as dominant. These are not abstract ideas; they are observable in how the model frames the subject relative to the horizon line when you use the language explicitly.
The 180-degree rule still applies. When two subjects interact, keep your eyeline prompts consistent. If subject A is prompted looking screen-left and subject B screen-right, do not flip that in a cutaway or the geography will break in the edit. Write the eyeline direction into each prompt for every shot in the scene, even if it feels redundant.
```
"low angle, camera positioned below eye line looking up at subject,
subject looks screen-right toward off-screen presence,
[focal length anchor], [action description]"
```
Building the coverage document before you generate
A single page is enough. For each scene, list:
1. Establishing (wide, neutral height)
2. Master (mid, neutral height, covers the full action)
3. Coverage close-ups for each subject (tight, neutral to slight low angle)
4. One insert (specific object or detail that earns a cutaway)
5. One alternative angle (over-the-shoulder, POV, or canted if the scene calls for it)
Generate these in order. Label your exports by coverage unit, not by generation number. When you open the edit, you will have a sequence that can actually be assembled as a scene, because the shots speak different languages.
What changes in the edit
When your coverage is genuinely varied in scale, height and angle, three things happen. Cuts feel motivated because the viewer's eye is moving through three-dimensional space. The scene has a natural rhythm because some shots are slow and environmental and others are tight and immediate. And artefacts become easier to manage: a generation with a bad hand or a flickering edge can be cut around using the insert or the wide, because you now have real options.
Start with your next scene rather than your next generation. Write the coverage list before you open any model interface, and treat the focal-length anchors as fixed text you paste in rather than rewrite each time.